Buying a domain name is the first step of starting a new website.
Fortunately, it is both very easy and super cheap to buy a domain these days.
In this step-by-step guide, I will show you how to do this in a matter of minutes.
Just follow the 6 steps and you will own your own domain by the time you reach the end of the article.
That being said, if you are unsure about which domain to choose, then read this article on 12 things to do before buying a domain.
Here are the 6 steps to buying a domain name:
1. Go to the website of a domain registrar, such as namecheap.com
The companies you buy domains from are called domain registrars.
In this article, I show you how to buy a domain from NameCheap, which is the domain registrar I use most of the time.
It is one of the best-known domain registrars and they have outstanding customer service. As the name implies, they are also inexpensive and offer various useful features for free.
Other popular domain registrars include Google Domains, GoDaddy, Domains.com and many others. But for the rest of the article, I show you how to buy a domain using NameCheap.
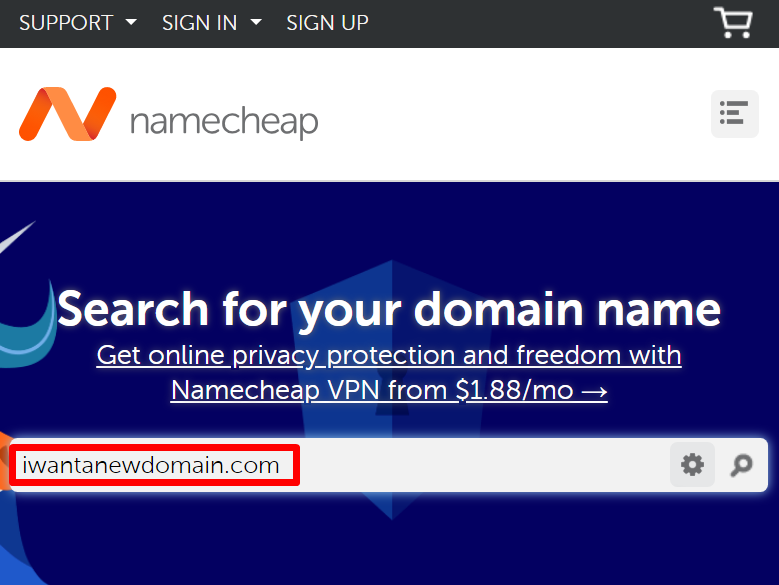
So, the first step is to go to NameCheap’s website.
2. Type the domain you want to buy into the search box
Now you should type the domain you want to buy into the search box, then hit Enter.
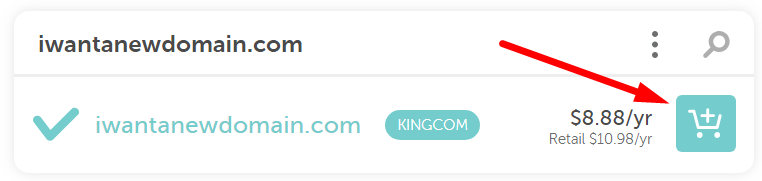
3. If it’s available, click the Add to Cart button
If the domain name is available, you will see an Add to Cart button on the right. Click this button and proceed to step 4.
If your chosen domain is not available, then you will get some similar alternative domain suggestions instead.
Usually, these are bad options, so if your preferred domain is unavailable then you should probably go back and think of another good domain.
Once you’ve thought of another domain, start over and type the new domain name into the search box.
4. Click View Cart and then Confirm Order
Next, you click on the View Cart button.
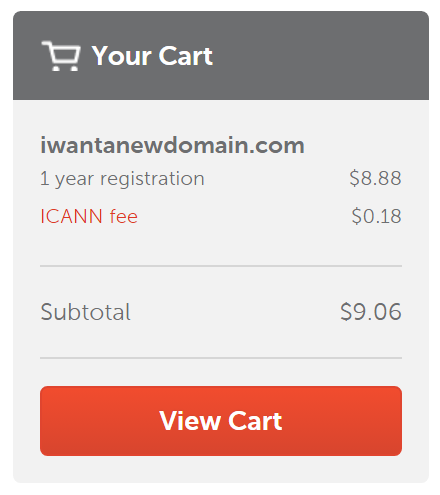
This will take you to a page where you select some details related to your domain registration.
You can keep all the default selections for now, since you can always change them later after you’re done purchasing the domain.
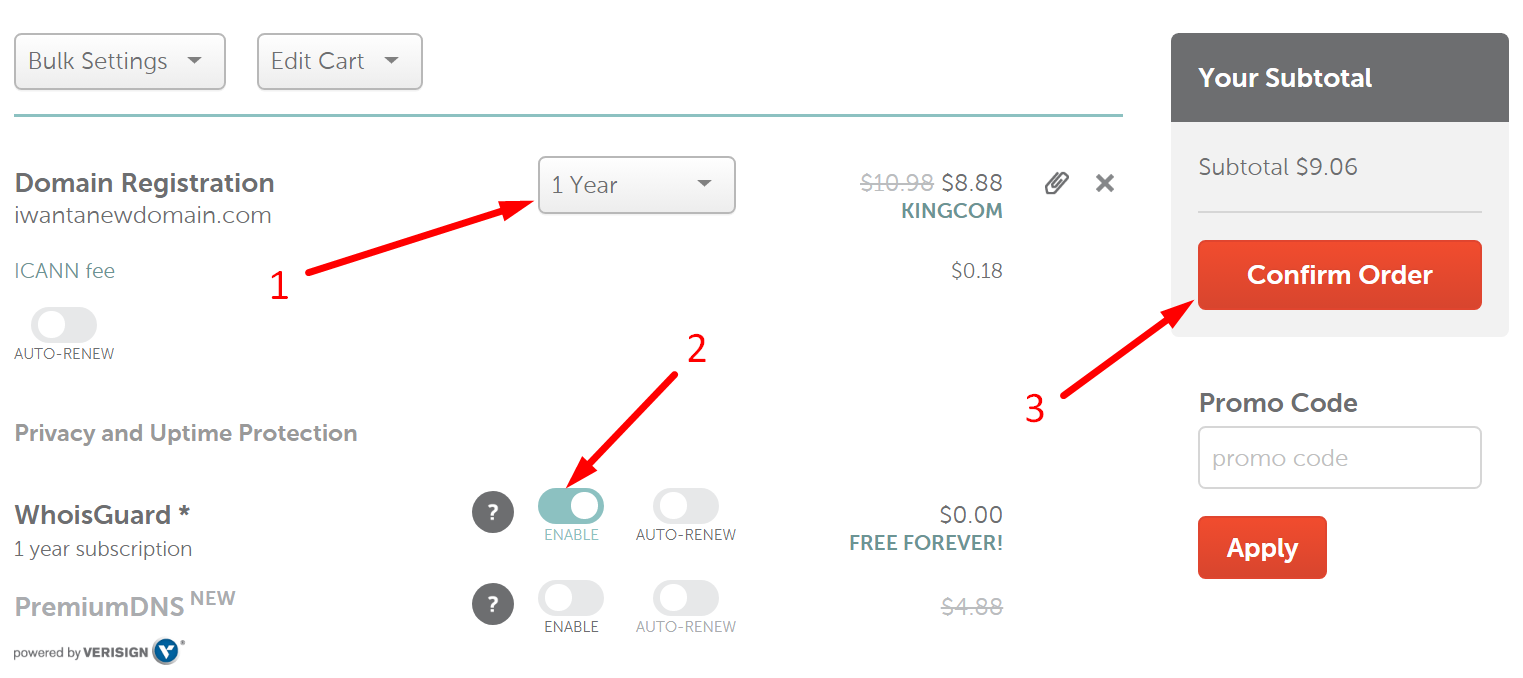
If you are wondering about the options, this is what they mean:
- Domain registration: How long you want to register the domain for. Usually 1 year is fine, since you will be able to renew before it expires (don’t worry, NameCheap will remind you).
- WhoIsGuard: Enable this if you want to keep your ownership of the domain private. You can change it later.
- PremiumDNS: This is an advanced feature that you are unlikely to need. I recommend keeping this disabled.
Feel free to ignore all the other optional add-ons on the page for now. You don’t need them and you can always add them later after you’re done buying the domain.
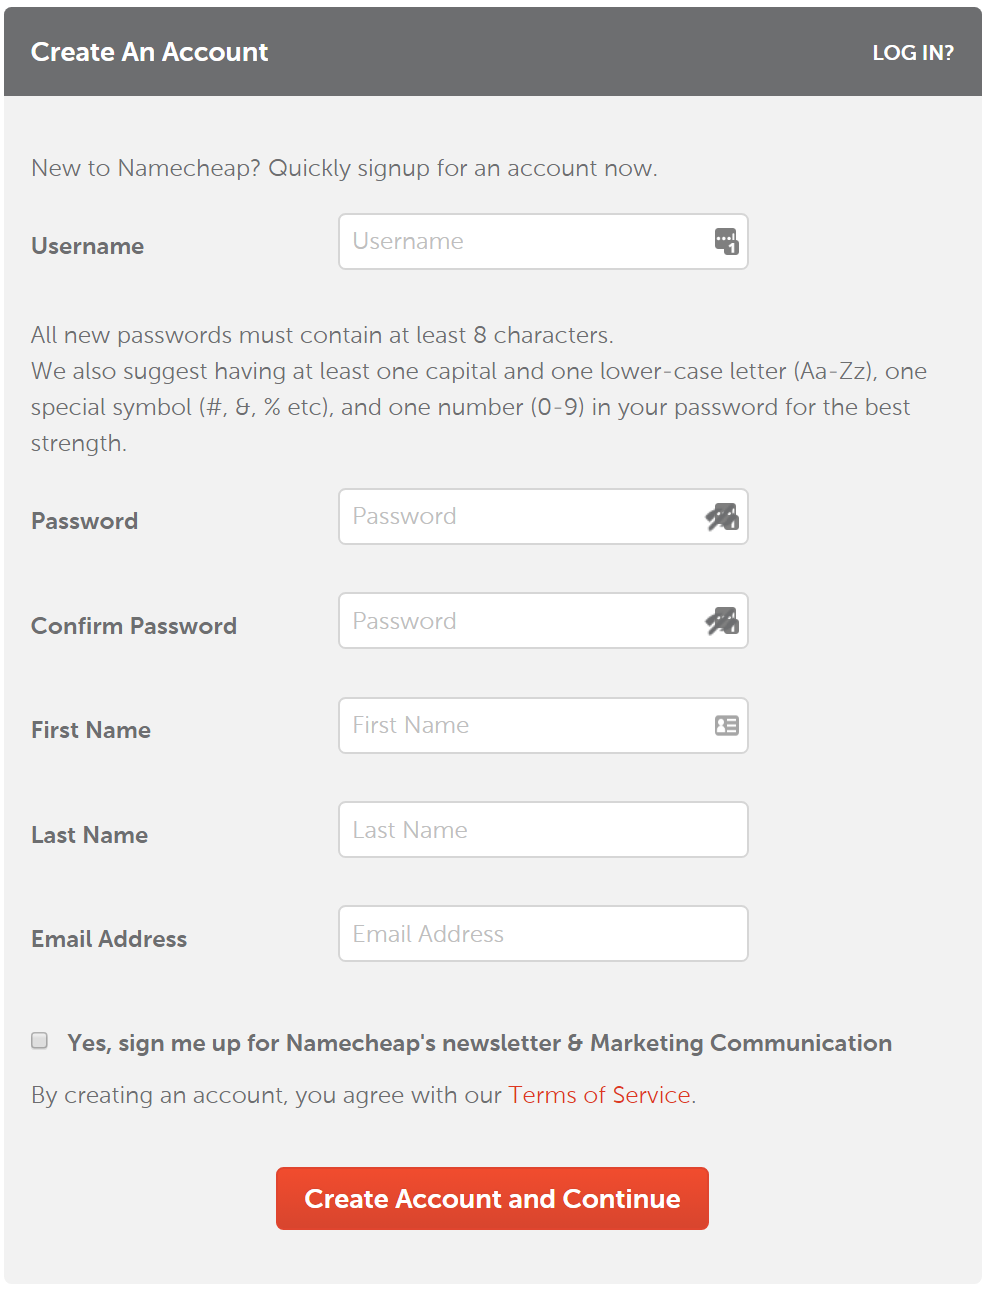
5. Fill in your details
Now you need to create an account. This is so that you can log in and manage your domain later on.
Add all your user details, then click the button to continue.
On the next page, you enter your payment info, as well as address and other personal details.
If you scroll down, you also get the option to automatically renew the domain before it expires. I recommend checking this option if you want to own the domain for a long time (you can always change it later).
Now click Continue.
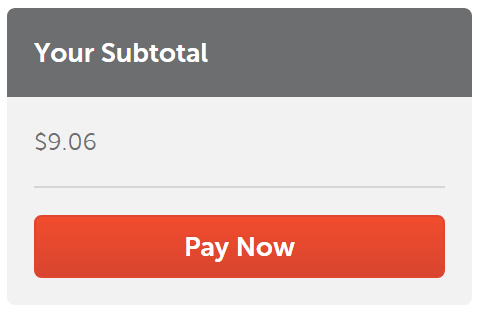
6. Complete the domain purchase
Here you will see the final price. Review this page and then click Pay Now.
NameCheap will then process your payment. On the next screen, you will see a summary of your order.
Congratulations! Now you own your own domain.
What to do after you buy the domain?
Just buying a domain won’t get you all the way.
The next step is to buy web hosting so that you can put a website on the domain.
If you are a beginner, then you can get great web hosting from SiteGround for as little as $3.95 per month.
Their servers are fast, their hosting is super easy to use and their great customer support is available 24/7/365.
I also recommend that you install WordPress on your site, which is the most popular website software in the world and powers 33% of the web. It is also 100% free.
For more details, here are 11 reasons to choose WordPress for your website.
Once you have WordPress installed, you can start adding stuff to your website and creating content.
You can easily install WordPress on your site with SiteGround. You just buy the web hosting and then click a few buttons to set up WordPress.
They also provide simple instructions on how to connect your domain to your web hosting account.
You can even register the domain with SiteGround if you want to save yourself a few steps. But I personally prefer to keep my domain registration separate from my web hosting.
Take-Home Message
To buy a domain name, you just go to a domain name registrar, like NameCheap or Google Domains.
Then you enter the domain you want to buy, enter your details and pay a registration fee.
Of course, you can’t just buy any domain, since it needs to be really good and it can’t be one that is already registered.
You want to get a domain that is relevant and easy to type and remember. It also needs to be trustworthy and professional.
At the end of the day, creating your own website has never been easier.
All you need is a domain and a web hosting account, then you can build a professional-looking website for free with WordPress without having to know how to code.
Follow the steps in this article to buy a domain. Then get a web hosting account and install WordPress.
After that, you can get started building a great website with fantastic content.